CLICK HERE FOR FREE BLOGGER TEMPLATES, LINK BUTTONS AND MORE! »

Saturday, July 16, 2011

Family Blocks

I've made several versions of these blocks before but they were all the same height. This time I wanted to change it up a bit. A few weeks back I took a 2x4 and cut into random lengths. I didn't have a particular project in mind but I had the wood and the saw was right there so  figured I would cut first plan later :)

Yesterday I decided to throw together this cute little project because I'm trying to reorganize my living room shelves.

What you will need:
6 blocks of 2x4 cut at random lengths
brown paint
scrapbook paper
school glue

 I sanded down the edges of my blocks then painted the sides and fronts brown. I don't paint the entire front, just enough around the edges that my paper will cover. I measured my paper then cut it with some decorative scissors and glued it on. I just use regular ole school glue, it works just as well as modge podge and it's less expensive.

Next I use my nifty Silhouette machine and cut out my letters to spell F-a-m-i-l-y and glued them on.


Let dry and display. I looove them! Now I just have to figure out what else to put on that shelf.


Hope you have a great weekend! I'm linking up at these places.

Tuesday, June 21, 2011

Girl's Room Preview!

So I've gotten a couple things done this past week on the girls room. Slowly but surely this room is coming together. I still have to make some curtains, put up the chair rail, finish up painting, oh and convince the hubby to let me paint the wood floors white *YIKES*

I threw this little cutie together in about 10 minutes :) I had a leftover 1x4 that I spray painted with my new favorite watermelon color. Then I cut out a stencil on my Silhouette and painted on my words. Next I drilled a couple holes and hung it by some twine. LOVE!

*Never mind those roller shades, they will be leaving*
Here are a couple more pics I took to give you a sneak peek at some things.

This is Baby Sis's crib bedding.

These are the flowers I stenciled on the closet wall.


I thought I would leave you with another sneak peek at a project that I am working on for a friend that is getting married this summer. I am so excited to finish it up and show you how it turned out!
Goodnight all!


Monday, June 13, 2011

Roman Shades

So most of our weekend was spent doing fun things like this :)


 So this morning I decided I needed to do something productive. My sis is coming in one week and I am racing to try and finish the bathroom before she gets here. What a marathon this bathroom has been, but I'm almost ready to post the final pics!

A few months back I read a post from Little Green Notebook where she turned her mini blinds into roman shades. Genius I tell ya! Well the mini blinds in my bathroom were grrooosss, they were in the house when we bought it and had collected dust fooreevver. So first I laid them out on my bathroom floor. Making sure to let them all the way out.

Then following the directions from above, I slipped all but 6 of the slats off. My window is 52" tall and I wanted a little extra so I placed my slats 8" apart. I had this green curtain hanging in there already so I just cut it to fit. Next I hot glued my slats down. *The tutorial says dont use hot glue but I did and it worked fine* Be careful when gluing your slats not to glue the lift cord and at the top make sure that you can still slip your blinds back in their brackets.

Here they are! I have to say I'm pretty satisfied with them! Now I have to take the brackets from the old cheap curtain rod down and finish up that bathroom! (P.S. Yes that is a trailer full of sand and bails of hay in my backyard, I live in the middle of podunkville people!)
 Hope you have a good day!
I'm linking up here Keeping it Simple and here Savvy Southern Style

Thursday, June 9, 2011

New Windows!

Well this actually happened a couple months back but as you can see I have a hard time keeping up with all of you other great bloggers!

Since we moved into this house we knew that we were going to have to have new wondows. Ours were in terrible condition, some were rotted, and some were even cracked. Also the previous homeowners had caulked all of the windows shut so we couldnt even open them!

See all of that lovlieness. *YUCK*

So finally we were able to get up the money to replace them.

Big holes in the kitchen :)


New pretty windows that actually work! (Excuse all of my dishes, I hate dishes)

Well thats all for today, we have been playing musical bedrooms around here so hopefully soon I can get up some more posts.

Wednesday, March 16, 2011

Hello Easter!

So the Easter Bunny struck a day early who cares?! I was done with St. Patricks Day and was ready to get in my Spring stuff! This might also have something to do with the arrival of my BRAND NEW SILHOUETTE! So this is what my overly shelves looked like this morning.

Here they are now!
I got this cute little tree at the Dollar Store and propped it up on a wood block so that it would show behind my 2x4 blocks. I just cut all of my letters out on the Silhoutte and Mod Podged it all together.


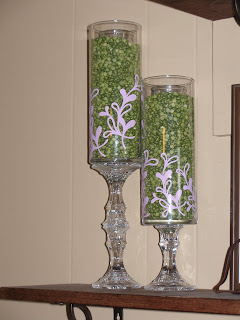
I got these babies in the dollar been at the "Red Walmart" and I had to put my cuties initals on them. I want to fill them with something but I'm not quite sure what yet.

I also made the penant with my new fun toy!

Hope you all have a great day :)


Tuesday, March 8, 2011

Living Room Makeover

Hello there! I know I haven't blogged in a while but we have been doing some renovations to the house and well I had baby #3 so I have been a little busy.

When we first bought our house this room was a big ole stinkin mess! I wish I had the pictures to show you, picture linoleum floors and awful dark paneling oh and the fact that there was once a kitchen in this room!

We ripped out the kitchen laid new floors and painted all the walls white.
(Yes that's big brother haha)


 It sat like that for a while and I got the bright idea that if I painted the walls YELLOW that it would tone down my red furniture, yeah right!

This is what it looked like after that. I loved my picture wall.

These next 2 pics came from Christmas morning but they were the only shots I could find of these 2 parts of the room, you can see we have this weird corner between the kitchen doorway and the hallway doorway.
 

Ahh Young and the Restless :)
Now after 4 years of all of this I couldn't stand it any longer. So my wonderful twin sis over at Semper Fi Life and my kids Nana came over to help me out with this huge project, seein as how I was 8 months pregnant and all. I needed all the help I could get!

Some paint, new furniture, blood, sweat, tears(children's tears b/c we wouldn't let them in the room), and a frazzled pregnant woman later and here she is in all her splendor!
  
Yes that's my Christmas tree under there ;)


Sis keeps making her way into my shots hehe :) I moved the Hubs recliner over to the weird corner, I'm still trying to figure out if I like that or not. Also I think it needs more color but for now I am thrilled with it!

I'm linking up here Between Naps On The Porch


Sunday, December 12, 2010

Hairbow Holder

Well I have about 3 more crafts I need to post about but for now this is just a little gift I put together for a friend. The K is actually for our new addition but I haven't quite finished it yet.

I just picked up a couple of letters from HobLob for $1.99 apiece.

I used a couple of stencil brushes and a medicine cup to make my circles. Then I hot glued my ribbon on the back.


A cute little wood butterfly from HobLob to weigh it down and wah-lah!

There it is, I'm going to add a couple of homemade hair bows before I give it to her.